

Getting started
Set up your first Agent, step by step.
This guide follows the setup flow inside your account exactly. Most people reach a working browser test within a few minutes, and your progress is saved at every step, so you can leave and come back whenever you like.


Before you begin
- A work email address to create your account.
- Your company website, if you have one. If not, a few documents such as a price list, a services overview or your most common questions.
- Your opening hours, and the number calls should transfer to when a caller asks for a person.
- A computer with a microphone, so you can talk to your Agent in the browser.


Step 1
Your company
Tell us about the business your Agent will represent.
- Enter your company name, your country and your industry. Your country sets the default time zone for opening hours.
- Add your website address. We read public pages only, never anything behind a login.
- Choose what your Agent should do first, such as receptionist or appointment booking. This picks the template your Agent is drafted from.
Tip. No website? Skip the field and upload documents in step four instead.


Step 2
Reading your website
We turn your public pages into knowledge your Agent can use.
- We discover pages on your site and read them. The page updates on its own and shows how many pages were added.
- If a site cannot be read, you can try again or carry on and add documents later.
- You can add or remove pages later from the knowledge tab of your Agent.


Step 3
Meet your Agent
Review the Agent we drafted and talk to it straight away.
- You will see a greeting and a summary of the instructions written for your business.
- Press the test button and speak to your Agent through your browser. Ask the questions your customers ask most.
- Change anything that does not sound right before you continue.
Tip. Try switching between English and Arabic in the middle of a question to hear how your Agent follows.


Step 4
Make it yours
Add documents, opening hours and where calls and summaries should go.
- Upload documents such as price lists, policies or frequently asked questions.
- Set your business hours so the Agent knows when your team is available.
- Add a transfer number in international format, for example +971 4 123 4567. Calls go here when a caller asks for a person.
- Add the email address that should receive a summary after every call.


Step 5
Pick a plan
Choose the plan that matches your expected call volume.
- Every plan includes browser testing. Paid plans include monthly call minutes and a per-minute rate beyond them.
- Payment is handled by our payment partner. We never see or store your card details.
- You can change your plan later from your account settings.


Step 6
Get a number
Give your Agent a phone number so it can take real calls.
- Instant numbers are available immediately in some countries.
- Numbers in the UAE and Saudi Arabia usually need business documents and a review before activation, which can take several days.
- You can also bring your own number by forwarding or porting the business number your customers already know.
Tip. Waiting for a number to be approved? Keep testing in the browser and refining your Agent in the meantime.


Step 7
Connect tools
Link the systems your team already works with. This step is optional.
- Connect calendars for bookings, CRMs for leads, email and messaging for confirmations and alerts, and help desks for support tickets.
- Developers can receive call events in their own systems through signed webhooks.
- You approve each connection yourself and can disconnect it at any time.


Step 8
Go live
Check that everything is ready, then publish your Agent.
- A short checklist confirms your Agent has knowledge, a plan and a number.
- Anything still missing is listed clearly with a link to fix it.
- Press publish. Your Agent starts answering real calls, and every call appears in your dashboard with its summary.


After you go live
- 01
Read your call summaries
Review the first few days of calls closely. They show you exactly where the Agent needs more knowledge or clearer instructions.
- 02
Improve the knowledge
When a caller asks something the Agent could not answer, add it to a document or your instructions. The Agent improves with every addition.
- 03
Publish changes safely
Edits are saved as a draft first. Your live Agent keeps working unchanged until you test and publish the new version.
Stuck on a step?
Write to us and a person from our team will help you through it.
Where you will work
Two screens you will use every day
Most of the setup above happens on the Agent page. Once it is live, the Command Center is where you put it to work.
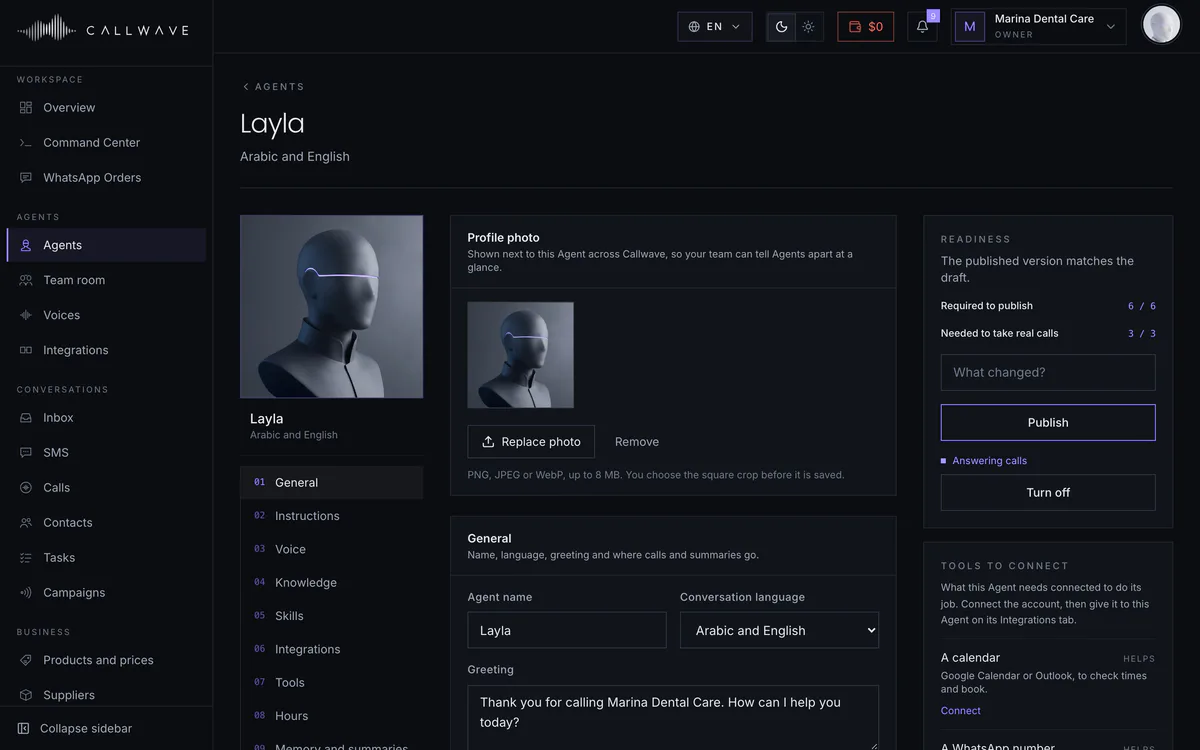
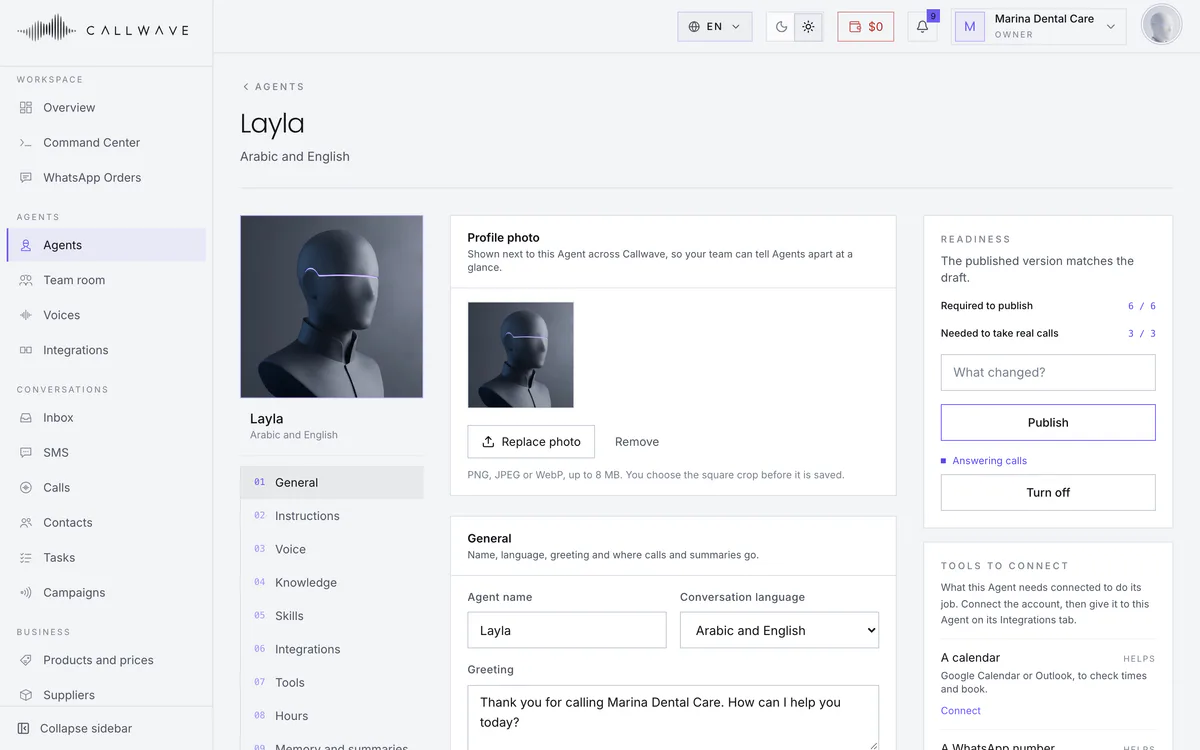
The Agent page
Photo, name, greeting and language, with readiness and the publish button always in view.
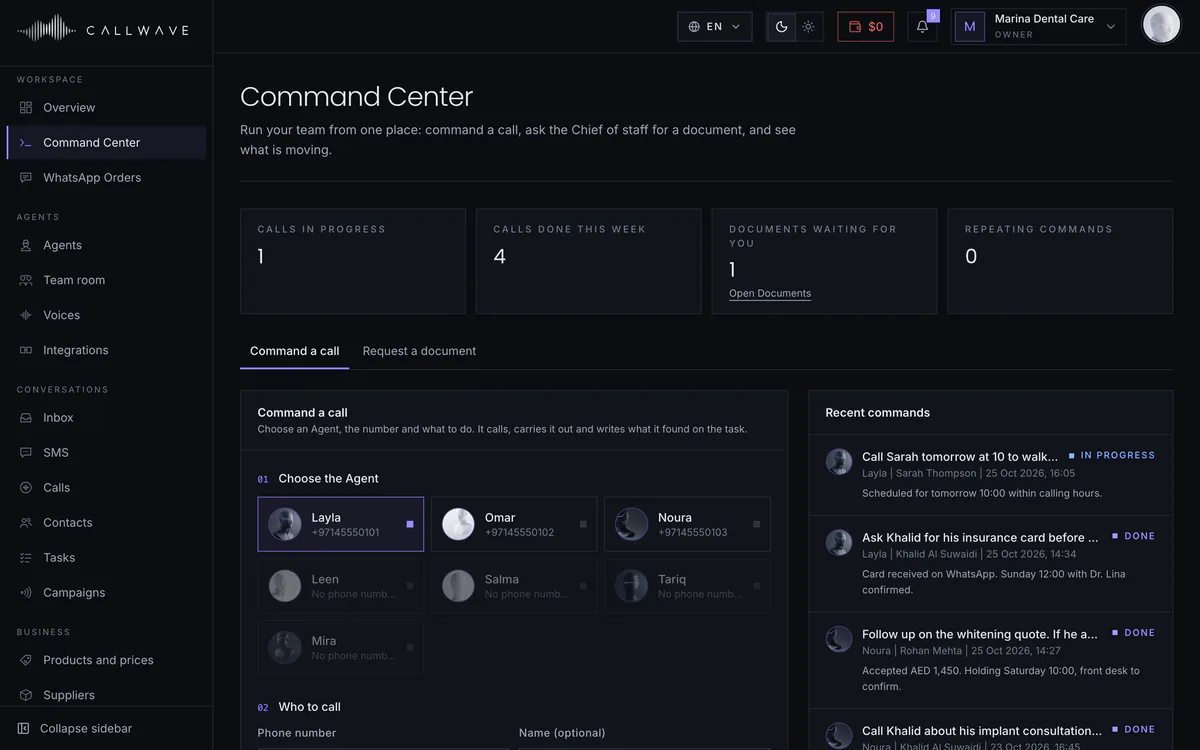
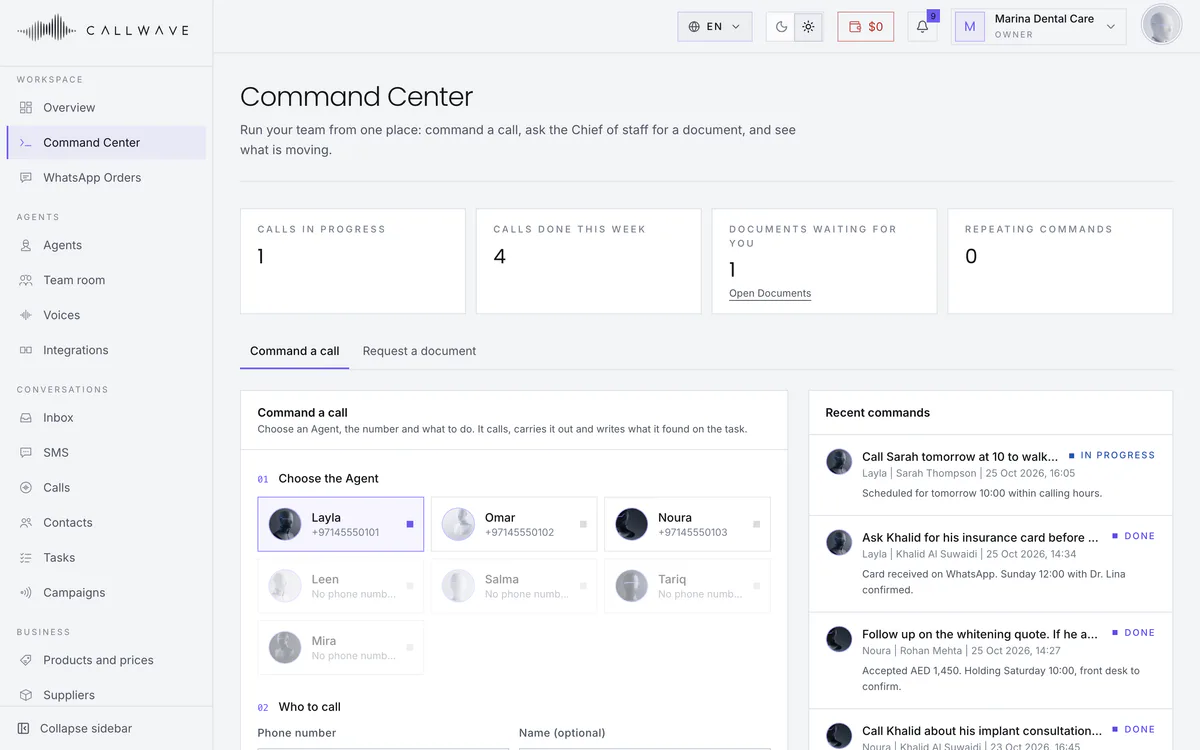
Command Center
Command a call or ask your Chief of staff for a document. Results come back on the task or in the chat.
Sample workspace. People, numbers and figures are fictional.